
Kitchens and bathrooms drive up to 70% of a home’s overall market appeal and resale valuation. These dual hubs of domestic activity experience the heaviest daily wear, highest humidity levels, and greatest concentration of mechanical infrastructure. When property owners embark on home upgrades, the initial instinct is often to execute a full tear-out—demolishing walls, rerouting waste pipes, and discarding existing cabinetry. However, indiscriminate demolition often yields diminishing financial returns, swallowing tens of thousands of dollars in structural refabrication while delivering minimal incremental value over targeted cosmetic and mechanical refinements. High-yield home renovation demands a tactical balance between structural preservation, strategic cosmetic refinishing, and proactive utility upgrades. By focusing capital allocation on high-touch surfaces, moisture protection, and behind-the-wall infrastructure integrity, homeowners can achieve luxury aesthetic transformations while preserving equity, eliminating future emergency repairs, and optimizing long-term home performance.
Preserve Solid Cabinet Carcasses to Reallocate Budget Toward Upgraded Amenities
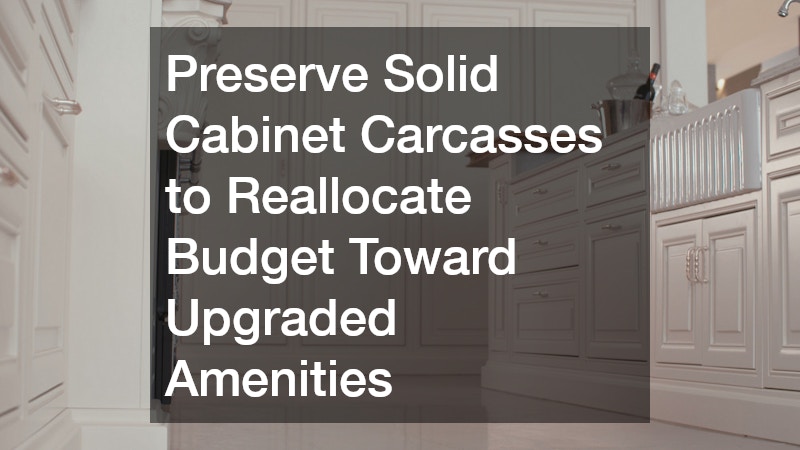
Complete cabinetry replacement accounts for nearly 35% to 40% of standard renovation budgets. In many homes constructed within the past three decades, the core box structures—frequently built from solid 3/4-inch plywood or dense furniture-grade particleboard—remain structurally pristine even when the exterior finish displays severe wear, grease buildup, or outdated stain colors. Tearing out structural carcasses simply to change an aesthetic surface represents an inefficient allocation of capital that could otherwise fund premium amenities. Integrating carcass preservation into a holistic kitchen remodeling plan preserves the original floor layout while diverting thousands of dollars toward functional hardware upgrades and premium storage solutions.
- Inspect cabinet boxes for sagging shelves, water damage near sinks, or structural delamination before deciding to preserve them.
- Reallocate saved millwork funds toward heavy-duty full-extension drawer slides, blind-corner pull-out organizers, and integrated pantry racks.
- Upgrade soft-close door hinges to eliminate mechanical slamming and preserve door frame alignment over years of daily operation.
- Replace outdated face-mounted hardware with clean, concealed soft-close drawer runners rated for at least 75 pounds of dynamic load.
Apply Factory-Grade Spray Finishes and Hardware for Immediate Modernization
Field-applied brush painting rarely delivers the smooth, durable finish required to withstand the high-moisture, high-grease environment of culinary spaces. Brush marks create subtle surface ridges that accumulate oil and grime, leading to premature peeling and difficult cleaning routines. Achieving an authentic furniture-grade surface requires specialized equipment, meticulous chemical surface preparation, and catalyzed coatings that cure into a cross-linked protective shell. Partnering with a professional cabinet painting contractor ensures that doors and drawer fronts are removed, transported to a climate-controlled environment, thoroughly degreased, machine-sanded, and sprayed with high-solids conversion varnish or catalyzed polyurethane.
- Verify that the surface prep protocol includes solvent-based degreasing, mechanical profiling with 180-grit sandpaper, and stain-blocking bonding primer.
- Opt for conversion varnish over standard latex paint to gain superior chemical resistance against acidic cooking splatters and aggressive cleaning agents.
- Fill previous hardware mounting holes with two-part epoxy filler prior to priming, allowing complete freedom to select modern handle center-to-center dimensions.
- Ensure a dust-free spray environment with dedicated drying racks to prevent airborne particulates from embedding in the wet finish during curing.
Repair Surface Imperfections and Reseal Stone to Avoid Costly Replacement
Natural stone and engineered quartz countertops represent major initial financial investments, yet they are frequently subjected to harsh localized impacts, thermal shocks, and acidic etching. Throwing away damaged granite or marble slabs because of minor edge chips, open seams, or surface etching is an unnecessary expense. Advanced stone restoration methodologies permit localized structural repairs that seamlessly blend into existing vein patterns. Engaging expert services for countertop repair and restoration allows homeowners to eliminate noticeable chips along sink cutouts, hone away superficial glass etching, and pull deep oil stains out of porous stone using specialized chemical poultice treatments.
- Address chips along heavy-use drop zones using two-part color-matched acrylic or epoxy resins cured with ultraviolet light.
- Hone etched marble or limestone surfaces using diamond-impregnated resin pads, moving systematically from 400 to 3000 grit for an even, factory-matched sheen.
- Apply solvent-based fluoro-chemical impregnating sealers every 12 to 18 months to form an oil- and water-repellent barrier inside deep stone pores.
- Re-grout and re-caulk stone-to-backsplash transition joints using 100% silicone sealant matched to the stone or grout tone to accommodate structural movement.
Select High-Performance Wall Coatings Engineered for Wet Microclimates

Bathrooms and kitchen splash zones present extreme environmental challenges, characterized by rapid relative humidity fluctuations, steam condensation, and frequent physical contact. Standard interior flat or eggshell paints quickly fail under these conditions, developing surfactant leaching, mildew growth, and finish degradation from scrub cleaning. Selecting specialized wall coatings engineered with anti-microbial additives and tightly bound acrylic resins prevents moisture penetration while expanding spatial visual volume through strategic light reflectivity. Contracting dedicated interior painting services guarantees proper substrate moisture testing, thorough spackle patching, and razor-sharp masking lines around trim and tile transitions.
- Specify satin or semi-gloss sheens containing built-in mildewcides for high-steam shower rooms and sink splash areas.
- Enforce a minimum 24-to-48-hour dry time for patch compounds before applying alkyd-based or high-adhesion acrylic primers.
- Utilize light-reflecting paint formulations with a high Light Reflectance Value (LRV) to make small, windowless powder rooms appear larger and brighter.
- Ensure all perimeter trim, baseboards, and window casings are sealed with flexible, paintable elastomeric caulking to stop moisture ingress behind walls.
Execute Precision Waterproofing and Custom Substrate Prep for Tiled Enclosures
Ceramic and porcelain tile installations are only as durable as the hidden substrates supporting them. The primary cause of shower failure, mold infestation, and structural subfloor rot is improper underlying waterproofing, not tile failure itself. Water easily migrates through standard cementitious grout lines and micro-cracks over time. To construct an impervious wet enclosure, installers must create a continuous sealed basin utilizing modern uncoupling membranes or sheet-applied waterproofing. Hiring a certified bathroom tile contractor ensures correct subfloor stiffness deflection calculations (minimum L/360 for ceramic, L/720 for stone), precise pre-slope mortar beds, and flawless liquid-membrane applications.
- Install uncoupling membranes over plywood subfloors to isolate tile installations from natural wooden expansion and contraction movement.
- Apply continuous sheet waterproofing or liquid-applied membranes directly beneath tile beds, running the membrane up walls at least two inches above the shower arm height.
- Specify 100% solids epoxy grout for floor shower pans to eliminate water absorption, chemical degradation, and permanent stain discoloration.
- Verify tile layout symmetry and lippage control using mechanical leveling clip systems during installation, especially for large-format porcelain slabs.
Reconfigure Behind-the-Wall Pipe Infrastructure Before Final Finishes
Coverings like custom tile, quartz vanity tops, and custom millwork permanently seal off the plumbing cavity inside walls and under floors. Placing brand-new luxury fixtures over aging, corroded galvanized iron or degraded polybutylene piping invites catastrophic water leaks that destroy fresh finishes. Any comprehensive remodel of wet areas requires exposing, inspecting, and modernizing primary water supply lines and drain stacks. Engaging an established plumbing company allows homeowners to safely re-route supply lines for double-sink vanity conversions, install thermostatic shower mixing valves, and replace obsolete metal piping with cross-linked polyethylene (PEX-a) or rigid copper systems before closing up walls.
- Replace galvanized steel or aging copper supply lines with PEX-a piping to optimize water flow rates and eliminate internal mineral scaling.
- Install dedicated pressure-balancing thermostatic valves with integral stop valves, allowing future cartridge servicing without turning off main house water.
- Mount multi-port water distribution manifolds to ensure equal water flow and eliminate hot/cold temperature shocks when other fixtures are operated simultaneously.
- Incorporate accessible shut-off valves and water hammer arrestors immediately adjacent to high-pressure washing machines and refrigeration ice lines.
Flush Main Waste Lines Before Installing New High-Flow Fixtures

Modern high-efficiency plumbing fixtures, such as dual-flush toilets and low-flow showerheads, move waste through drain lines using significantly lower water volume than older units. If existing main waste lines contain accumulated mineral scale, grease deposits, or tree root intrusion, reduced water velocity can cause severe drain blockages and main line backups shortly after construction ends. Clearing main branch pipes prior to final fixture installation is essential to ensure trouble-free drainage. Arranging for comprehensive drain cleaning services complete with high-pressure hydro-jetting and video camera inspection identifies structural dips, pipe bellies, or obstructions deep within sub-slab lateral lines.
- Perform a full-length sewer camera inspection from the main house cleanout to the municipal sewer line before installing new bathroom fixtures.
- Utilize high-pressure hydro-jetting operating at 3,000 PSI to scour away stubborn grease encrustation and tree root infiltrations inside cast iron or PVC waste pipes.
- Verify correct drain line pitch (minimum 1/4-inch fall per linear foot) on all relocated waste lines to guarantee gravity-fed solid waste transport.
- Install accessible double-cleanout fittings outside the home foundation during construction to facilitate future maintenance access without disturbing interior floors.
Sanitize Air Shafts Post-Demolition to Protect Indoor Environmental Quality
Kitchen and bathroom demolitions generate significant volumes of fine particulates, including crystalline silica dust, pulverized drywall gypsum, wood fibers, and historic paint dust. Even when temporary plastic isolation barriers are deployed, negative air pressure from central air handlers routinely pulls fine particulates into return vents, distributing contaminants throughout ductwork. Running HVAC systems during or immediately following heavy construction coats internal duct surfaces and blower wheels, severely degrading indoor air quality and triggering respiratory irritation. Scheduling a professional air duct cleaning immediately following drywall sanding and tile cutting clears accumulated construction debris from the air distribution network.
- Seal all supply registers and return air grilles with protective adhesive film prior to initiating any structural demolition or drywall sanding.
- Utilize negative-pressure HEPA vacuum systems combined with rotary brush whips to dislodge fine gypsum and tile dust from interior duct walls.
- Inspect central air handler coils, blower assemblies, and condensate drain pans for construction dust accumulation that impedes thermal transfer efficiency.
- Replace all return air filters with high-efficiency MERV-11 or MERV-13 pleated filters once final structural cleanups are completed.
Audit Climate Loads Before Changing Floor Plans or Removing Walls
Open-concept floor plans that merge kitchens with living spaces drastically alter home thermal dynamics and air distribution patterns. Removing dividing walls, eliminating soffits, or adding large architectural windows changes heat gain, heat loss, and internal airflow paths. Standard existing HVAC supply registers may become completely inadequate or improperly positioned once room geometry changes. Consulting with an established hvac repair company prior to framing alterations ensures accurate Manual J heat load calculations, enabling technicians to re-balance duct dampers, relocate supply registers, and adjust system static pressure to prevent hot or cold spots in reconfigured open areas.
- Perform Manual J load recalculations when opening kitchen-to-living walls or adding large south- or west-facing window units.
- Re-route ductwork out of removed soffits into floor joist spaces or ceiling plenums while maintaining smooth, unrestricted airflow transitions.
- Calculate precise CFM exhaust requirements for bathroom ventilation fans, ensuring ducting vents directly outside through exterior wall caps or roof jacks.
- Balance branch supply dampers using air hood flow meters to maintain consistent room-to-room static pressures and temperatures throughout the home.
Add Supplemental Air Handling to Offset High-Heat Appliances

Commercial-style gas ranges, high-BTU cooktops, steam ovens, and multi-head luxury showers introduce intense localized thermal loads and excessive relative humidity into residential spaces. Standard central heating and cooling systems are rarely configured to manage sudden, concentrated spikes in sensible heat and latent moisture. Inadequate humidity control can lead to hardwood flooring cupping, wood cabinetry warping, and chronic interior wall condensation. Coordinating a specialized ac installation for ductless mini-split heat pumps or dedicated supplemental dehumidification systems provides isolated climate control tailored to high-demand culinary and spa environments.
- Install dedicated ductless mini-split units in large kitchen extensions or primary bath suites for independent, multi-zone temperature adjustments.
- Maintain ambient indoor relative humidity strictly between 30% and 50% to shield solid wood cabinets and finished drywall from dimensional warping.
- Pair high-BTU cooktops with properly sized range hood exhaust systems featuring dedicated make-up air dampers to prevent house depressurization.
- Select inverter-driven variable-speed cooling units to deliver precise continuous moisture removal without excessive short-cycling.
Executing a successful kitchen and bathroom remodel requires looking beyond surface cosmetics to evaluate the hidden mechanical systems that ensure long-term durability and functionality. By balancing targeted refinishing techniques—such as preserving sturdy cabinetry boxes and restoring existing stone surfaces—with proactive investments in plumbing, waterproofing, and HVAC systems, homeowners maximize both initial equity gains and long-term living comfort. Following a disciplined, sequential execution model guarantees that beautiful final finishes are supported by sound behind-the-wall infrastructure, eliminating the frustration of premature failures or costly emergency repairs down the road. Committing to expert trade craftsmanship, proper substrate preparation, and structural preservation transforms complex home renovation projects into predictable, highly rewarding equity investments.