Expanding your living space through a home addition is one of the most rewarding ways to adapt a house to your family’s growing needs. Whether you are adding a master suite, expanding a living room, or building a dedicated work-from-home wing, extra square footage enhances both your daily comfort and long-term equity. However, home additions are notoriously susceptible to budget overruns. It is not uncommon for unprepared homeowners to see final invoices exceed initial estimates by 20% to 40%.
Financial blowouts rarely happen all at once. Instead, they occur through a slow accumulation of unbudgeted soft costs, unexpected structural repairs behind existing walls, vague allowances in building contracts, and mid-project design changes. A successful build relies on treating budget management as a core structural element, equal in importance to footings, framing, and rooflines.
Planning a cost-controlled addition requires a disciplined approach to design, engineering, procurement, and project oversight. By specifying materials early, auditing your existing utility capacities, and establishing strict contractual boundaries, you can keep your expansion project on budget. This guide provides a detailed roadmap for managing every financial, mechanical, and structural phase of your home expansion.
Calculating Real-World Costs Beyond Square-Foot Averages

Before reviewing floor plans or selecting interior finishes, you must establish an accurate baseline budget. Many homeowners start with a simple square-foot cost estimate, assuming that multiplying an average regional rate by their target square footage will yield a reliable budget. This approach often leads to unexpected expenses because square-foot averages ignore essential soft costs and structural tie-ins.
A realistic baseline budget accounts for both hard construction costs and soft pre-construction expenses. Soft costs typically represent 10% to 15% of your total outlay and include architectural drafting, structural engineering stamps, soil testing, land surveying, and municipal permit fees. Failing to account for these items early forces you to borrow from your actual construction budget later, compromising the quality of your materials or scope.
Hard costs cover the physical construction of the addition, which can be broken down into distinct stages:
-
Site Preparation and Foundation: Excavation, concrete footings, slab or crawlspace construction, and backfilling.
-
Framing and Envelope: Dimensional lumber, wall sheathing, roof trusses, weather-resistive barriers, windows, and exterior siding.
-
Mechanical Rough-Ins: Extending electrical circuits, plumbing supply and waste lines, and ductwork into the new space.
-
Interior Finishes: Insulation, drywall hanging and finishing, flooring, trim, doors, paint, and light fixtures.
Consulting local home builders during the initial design phase helps establish realistic labor and material costs, while working with local custom home builders provides deeper insight into custom architectural details and site-specific structural requirements.
Establishing an Unbreakable Contingency Reserve Buffer
In addition to soft and hard costs, you must establish a non-negotiable contingency buffer of 15% to 20% of your total construction budget. When tying a new structure into an existing home, opening up exterior walls often reveals hidden issues, such as past water damage, outdated wiring, or inadequate structural headers. Having a dedicated contingency fund ensures these surprises are handled without disrupting your primary construction plan.
Structuring your financing so that contingency funds are held separately prevents them from being absorbed into the initial design phase. If your design matches your maximum borrowing capacity before breaking ground, any unforeseen structural issue will force you to cut finished materials or halt construction entirely.
When managing your contingency reserve throughout the build, keep these principles in mind:
-
Reserve for Structural Unknowns: Earmark at least half of your buffer exclusively for sub-surface ground conditions, framing repairs, or main electrical tie-in adjustments.
-
Avoid Decorative Rollover: Resist the temptation to use unspent contingency funds mid-project for high-end appliance upgrades or decorative tile changes.
-
Hold Until Final Sign-Off: Maintain the buffer until the final municipal inspection is passed and the contractor’s final invoice is processed.
Protecting this financial cushion guarantees that unexpected site conditions do not jeopardize your project’s completion or compromise the quality of your home’s structural components.
Optimizing Footprints and Structural Layouts for Efficiency
The architectural design of your addition directly impacts overall construction expenses. Complex footprints with multiple corners, bump-outs, and vaulted rooflines require significantly more labor and material waste than clean, simple geometric shapes. Optimizing your layout around standard building material dimensions reduces cutting time and material waste.
Building materials like plywood, drywall, engineered joists, and wall sheathing are manufactured in standard four-foot and eight-foot modules. Designing an addition in dimensions that align with these increments—such as a 16×24-foot space rather than a 15×23-foot space—allows builders to use full material sheets with minimal cutting. This speeds up construction, lowers framing labor costs, and minimizes dumpster rental fees.
Choosing between expanding outward or upward involves significant financial and logistical trade-offs:
-
Ground-Level Footprint: Consumes lawn area and requires foundation excavation, footings, and slab or crawlspace work. However, it avoids stripping the existing roof or vacating the main house during construction.
-
Second-Story Elevation: Preserves outdoor yard space but requires tearing off existing roof systems, adding structural support posts down to the basement, and reinforcing lower-level ceiling joists.
Keeping the structural layout straightforward allows local home additions to proceed efficiently, keeping crew hours low and reducing overall builder overhead.
Tying New Rooflines into Existing Structures Seamlessly
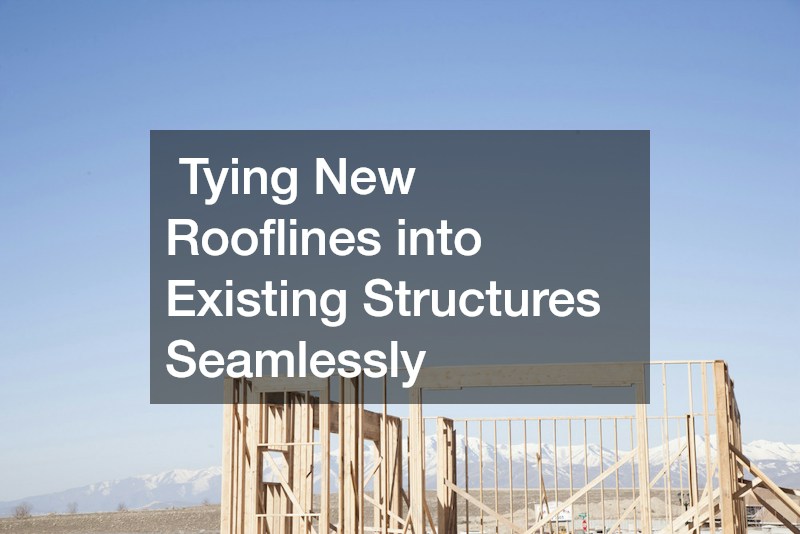
Connecting the new roofline to your existing home is another critical area for cost management. Complex roof intersections that create multiple valleys require extensive metal flashing and custom framing, increasing labor costs and creating potential leak points over time. Designing a simple gable or shed roofline that ties neatly into your existing eaves minimizes framing labor and provides reliable weather protection.
Proper roof integration requires evaluating existing rafter conditions and selecting the right tie-in method:
-
Eave Intersections: Extending an existing gable roofline outward creates a seamless exterior appearance and simplifies truss fabrication.
-
Shed Roof Attachments: Attaching a single-pitch roof below existing second-story windows reduces framing complexity and lowers material costs.
-
Valley Flashing Integration: Installing heavy-gauge ice and water shield beneath metal valley flashings prevents ice dams from backing up into framing seams.
Coordinating early with a professional roofing service ensures the new roof structure merges seamlessly with your existing roofline while maintaining effective water shedding. Properly engineered roof junctions prevent chronic moisture intrusion, protecting both old and new interior framing from costly water damage.
Evaluating Mechanical Capacity and HVAC Extension Options
Connecting a new addition to your home’s existing utility infrastructure requires careful evaluation prior to construction. Expanding your square footage places additional demands on your heating and cooling equipment, electrical panels, and plumbing lines. Discovering that your main panel or HVAC unit cannot handle the new space mid-build can quickly strain your budget.
Evaluate your HVAC capacity early with an load calculation. Adding 500 square feet to an existing central furnace or heat pump may push the system past its operational limit, leading to poor airflow and premature equipment wear. If your main HVAC unit lacks the capacity for the new space, installing a ductless mini-split system is often more cost-effective than replacing the primary furnace and running extensive sheet metal ductwork.
Strategic mechanical planning involves assessing three core supply networks:
-
Electrical Main Panels: Verify that your existing panel has open breaker slots and sufficient amperage (typically 200 amps) to support added lighting and outlet circuits.
-
Ductwork Access: Determine whether existing trunk lines can be tapped without reducing airflow to original bedrooms.
-
Smart Thermostats: Incorporate multi-zone controls so the new space can be heated or cooled independently based on actual usage patterns.
Partnering with an experienced insulation company guarantees the new building envelope meets energy codes, reducing thermal demand on your heating and cooling equipment and keeping long-term utility bills manageable.
Streamlining Plumbing Extensions and Waste Line Routing
Plumbing extensions require careful structural planning to avoid unnecessary labor expenses. Connecting supply lines and waste drains to distant main stacks requires cutting into existing subfloors, drilling through structural floor joists, or trenching through concrete basement slabs, adding significant labor costs to your plumbing estimate.
Aligning new bathrooms, wet bars, or laundry rooms adjacent to existing plumbing walls minimizes pipe runs and maintains proper drain slope without requiring invasive structural modifications.
To manage plumbing costs during framing and rough-in, keep these strategies in mind:
-
Stack Wet Walls: Position new upper-floor bathrooms directly above existing first-floor water lines to reduce vertical pipe runs.
-
Maintain Drain Slope: Ensure main drain lines achieve a minimum slope of 1/4 inch per foot toward the main municipal sewer connection.
-
Accessible Shutoff Valves: Install dedicated isolation valves for the addition so future maintenance does not require shutting off water to the entire house.
Partnering with a licensed plumbing service ensures all drain lines are properly sloped, vented, and pressure-tested before drywall is installed, preventing leaks behind finished walls.
Controlling Expenses in High-End Kitchen and Bath Additions

Kitchens and bathrooms are among the most expensive spaces to construct per square foot due to the concentration of plumbing, electrical, tile, and millwork required. When your addition includes expanded kitchens or new bathrooms, controlling finish costs is key to staying on budget without compromising durability.
Save on plumbing trade work by keeping fixture locations fixed during design. Moving a toilet or sink location three feet during construction requires rerouting main waste stacks and vent lines below the floor, which can quickly add thousands to your plumbing bill. Finalize your fixture layout on paper and commit to it before framing begins.
When specifying materials, balance structural durability with cost efficiency:
-
Cabinetry: Choose high-quality box construction, such as 3/4-inch plywood with dovetail drawer joints, but select simpler door styles like flat-panel Shaker doors instead of detailed custom profiles.
-
Countertops: Consider durable engineered quartz or granite rather than delicate marble, which requires ongoing sealing and is prone to etching.
-
Tile Selection: Use standard-format ceramic or porcelain tiles for large surface areas like shower walls and floor spaces, reserving accent tiles for small feature bands.
-
Valves and Fixtures: Select mid-range solid brass valves with ceramic disc cartridges, which offer long-term reliability without the markup of boutique designer brands.
Working with a specialized local bathroom remodeling contractor helps streamline tile, waterproofing, and fixture installation, while planning kitchen renovations with a clear specification sheet prevents costly change orders during the cabinet and countertop fitting phases.
Securing Building Envelopes with Effective Water Shedding
A home addition is only as durable as its weatherproofing. Where the new structure meets the existing home is vulnerable to water intrusion if flashings, house wraps, and roof gutters are not properly integrated. Water damage discovered after interior drywall is installed leads to expensive tear-outs and repairs.
To protect the new structure, install continuous water-resistive barriers across all wall-to-wall and wall-to-roof transitions. Flashing materials should be layered in a shingle fashion, allowing water to flow down and away from the building envelope. Pay extra attention to window pan flashings and door sills, ensuring water sheds away from interior subfloors.
Key weatherproofing focus areas include:
-
Wall-to-Wall Seams: Interlocking new house wrap behind existing siding ensures a continuous weather barrier across structural transitions.
-
Window Pan Flashings: Using self-adhering flexible flashing membranes inside window rough openings prevents hidden sill rot.
-
Kick-Out Flashings: Installing diverter flashings where roof eaves meet sidewalls directs concentrated water runoff directly into gutters.
Partnering with experienced home modification contractors helps adapt existing structural entries and exterior drainage pathways to support the new building footprint while preserving continuous thermal and moisture protection.
Upgrading Gutter Systems and Foundation Drainage Routes
Expanded roof surfaces collect significant rainwater, which must be safely diverted away from your foundation. Adding roof area increases the volume of water shedding around your home’s foundation during heavy storms. Standard residential gutters may overflow when handling runoff from large, connected roof planes, leading to soil erosion and foundation settling.
Proper site grading around the new foundation is equally essential. Ensure ground soil slopes away from foundation walls at a minimum grade of six inches over the first ten feet.
Managing roof runoff effectively requires a multi-layered drainage plan:
-
Oversized Seamless Channels: Upgrade standard 5-inch residential gutters to 6-inch seamless aluminum channels to handle increased water volume.
-
Downspout Placement: Position downspouts to carry water at least six to ten feet away from foundation footings using underground solid drain pipes.
-
Rain Diverters and Splash Blocks: Place heavy-duty splash blocks beneath downspout exits to prevent soil scouring near fresh concrete footings.
Integrating a heavy-duty gutter installation protects your fresh foundation footings from localized soil erosion and prevents water from pooling against basement or crawlspace walls.
Eliminating Change Orders with Fixed-Price Agreements

The final phase of budget management occurs during contractor bidding, contract negotiations, and construction oversight. A well-designed addition can still go over budget if the building agreement relies on vague language or unspecific material allowances.
Avoid fixed-price contracts that use generic allowances for major selections like flooring, lighting, or cabinetry. An allowance is a placeholder estimate included in a bid for items not yet selected. If a contractor allocates $2,000 for tile, but your actual choice costs $4,500, you are responsible for the difference, along with contractor markup. Eliminate this risk by specifying every finish item—down to the model numbers—before signing a contract.
Maintain financial control during construction by enforcing clear contract protocols:
-
Fixed-Price Agreement: Utilize a detailed fixed-price contract based on complete architectural plans rather than a time-and-materials agreement.
-
Detailed Scope of Work: Ensure every phase of labor, disposal, cleanup, permit acquisition, and material grade is documented in writing.
-
Milestone-Based Payments: Tie payment schedules to completed work and passed municipal inspections rather than arbitrary calendar dates.
-
Written Change Orders: Require all scope modifications to be submitted in writing with clear cost adjustments before any extra work begins.
Finalizing your design choices early and sticking strictly to your plan ensures your home addition finishes on schedule and within your budget.
Planning a budget-friendly home addition requires balancing design ambitions with disciplined financial management. By establishing an accurate baseline budget, designing efficient footprints, and auditing your home’s mechanical capacities early, you can expand your living space without financial strain. Specifying finishes in advance and securing clear, fixed-price contracts protects your contingency reserves and ensures smooth construction from excavation to final finish.
A well-executed home addition improves your daily quality of life while adding long-term value to your property. Treat every phase of planning as an opportunity to protect your financial investment. With a clear design plan, realistic material specifications, and solid trade partnerships, you can build the space your family needs while keeping your project firmly on budget.